

We've been slowing decorating the 1950's home we purchased last May and our fireplace might be my favorite thing in the whole house. We loved that the fireplace remained untouched by the previous owner, so we have be trying to find a non-obtrusive option for over the mantel. That is what led us to this plan...
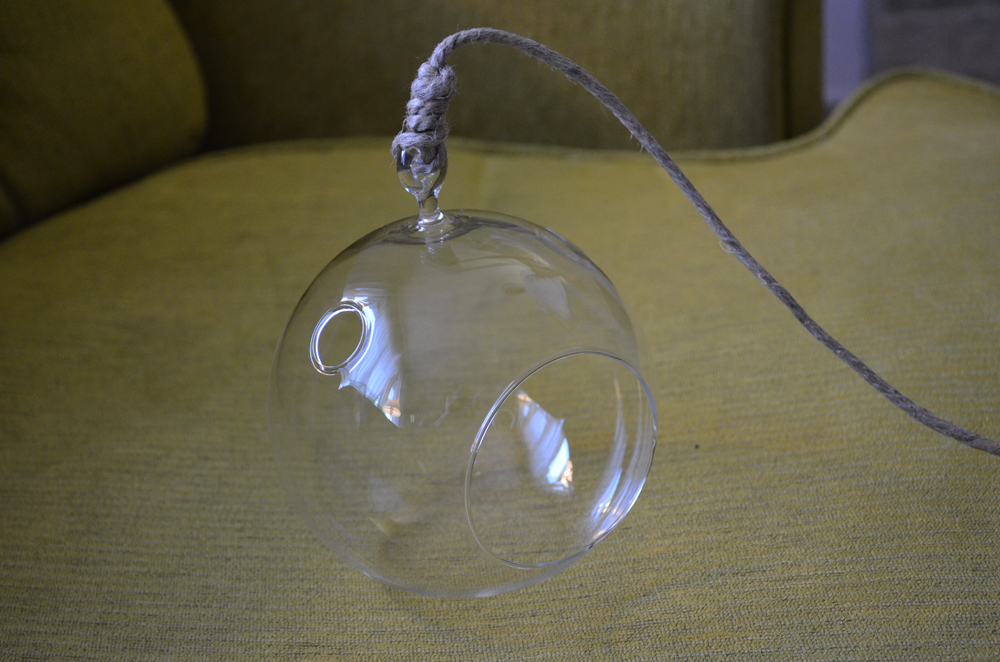
My husband got me 5 of these glass globes for Christmas and has been bugging me ever since about what I wanted to do with them. I absolutely LOVE them, but they've been sitting in our office for a month in a box waiting for me to do something with them...
I got the hint when a "surprise" package showed up in the mail the other day containing air plants. They were the perfect thing to put into the glass globes (I've seen this done before and actually recently pinned this on pinterest as a potential idea). I knew it was time to do something with them...
Now I will say, this was not 100% my idea... Adam had just as much of a part in this idea as I did (I thought I'd mention this so his feelings weren't hurt ;)....) Ok...enough chatting...here is what we did:

We took a trip to Home Depot to pick up a few items we knew we would need to construct the frame:
6 feet of 3/32" galvanized wire rope (which was WAY more than we ended up needing)
2 Ferrule & Stop Sets (one set for each side of the frame)
3' steel flat plate (don't know the technical term for it so I took a picture)
 |
| click on picture to enlarge |
A 2-pack of screw in hooks (for the ceiling)
Some hemp twine (we actually ended up using a thicker twine we already had on hand)
We already had the tools we needed and the globes/air plants so we were set!
We started by figuring our which holes we wanted to hang out plants from.
We wanted them evenly spaced, so we measured and counted holes.
We marked them with pieces of a sticky note.

We then measured and marked the center of the fireplace.
We then measured from the middle out on either side of the fireplace and marked where our cables would hang. (We wanted our cable to be 3 holes in from either side of the steel plate - so we measured the distance between the 2 holes and divided that in 1/2 to figure out where each cable would go)...
Since we wanted it centered over out 12" wide mantel, Adam marked 6" out from the wall from each cable mark and screwed in (by hand) each hook - I'm glad I didn't have to do this...
 |
| He used a hammer to get each hook started |
We were able to screw the hooks directly into the ceiling with no other support because we have plywood above in the attic. Make sure you're screwing into something that will support the weight of your "art". If need be, add additional support... better safe than sorry!
Next, we added the ferrule and stops on the end that would be looped onto the hooks in the ceiling.

... followed by the ferrule and stops connected to the steel plate.

We checked to make sure that the bar was level and then tightened everything up.
 |
| Yahoo! It's level! |
We then let the bar hang for a few hours because:
1) we wanted to make sure we weren't going to have structural issues
(even though Adam pulled firmly down on the hooks and they stayed in the ceiling)
2) I had a baby shower to attend and had to get a move on
Later that evening, we hung the plants. Adam tied some fancy (?) boy scout knots, we eyeballed the height we wanted each to hang, and tied a knot on the backside of the steel plate to secure the globes.
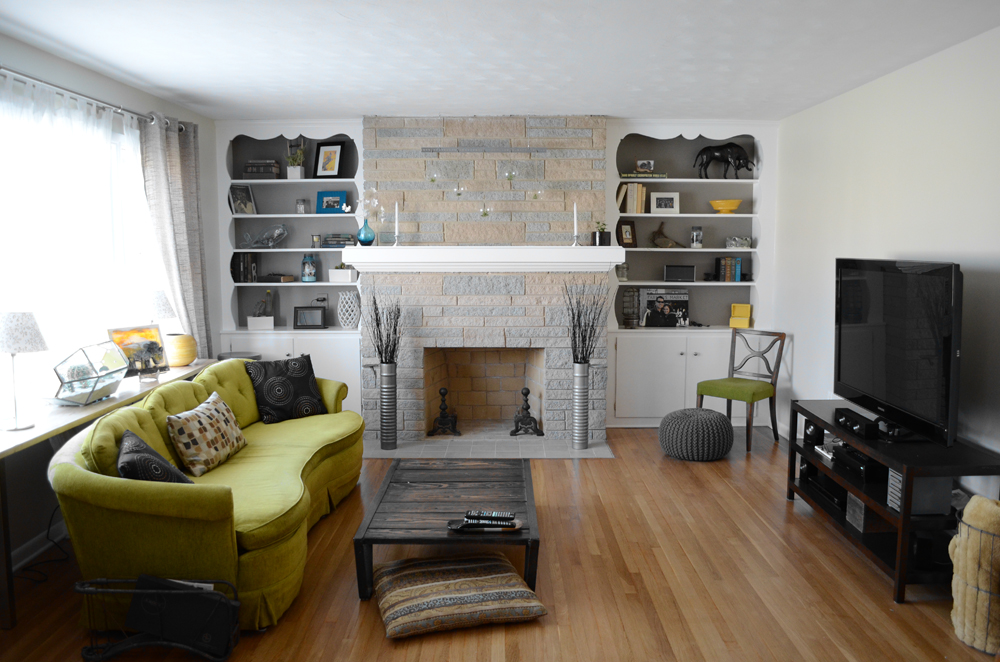
Here is what we were left with:


We love the uniqueness of it and my husband is happy that we're finally using my Christmas gift.
We're one step closer to finishing our family room and we love it!
Nice Job and Nice Floors
ReplyDeleteHe might be a keeper !
Keep putting him to the test you should know in 30 years
So light and airy in contrast to the rough texture of the fireplace bricks. I love it!!! Good job, you two :)
ReplyDeleteThanks! We're very happy with how it turned out :) Thanks for reading!
ReplyDeleteLove air plants, and I love how you styled them! Great idea!
ReplyDelete